This week I designed and began building the wood parts for the cat tree. I am not going to post pictures of the 3D models since they are pretty much just square pieces of wood and it would seem a bit redundant. I added extruded pegs on the side of the wood that is going to be attached to the wall and I will create holes in the walls of the cat house to make the assembly as easy as possible. This will also ensure they are in the perfect place and stay in the perfect place.
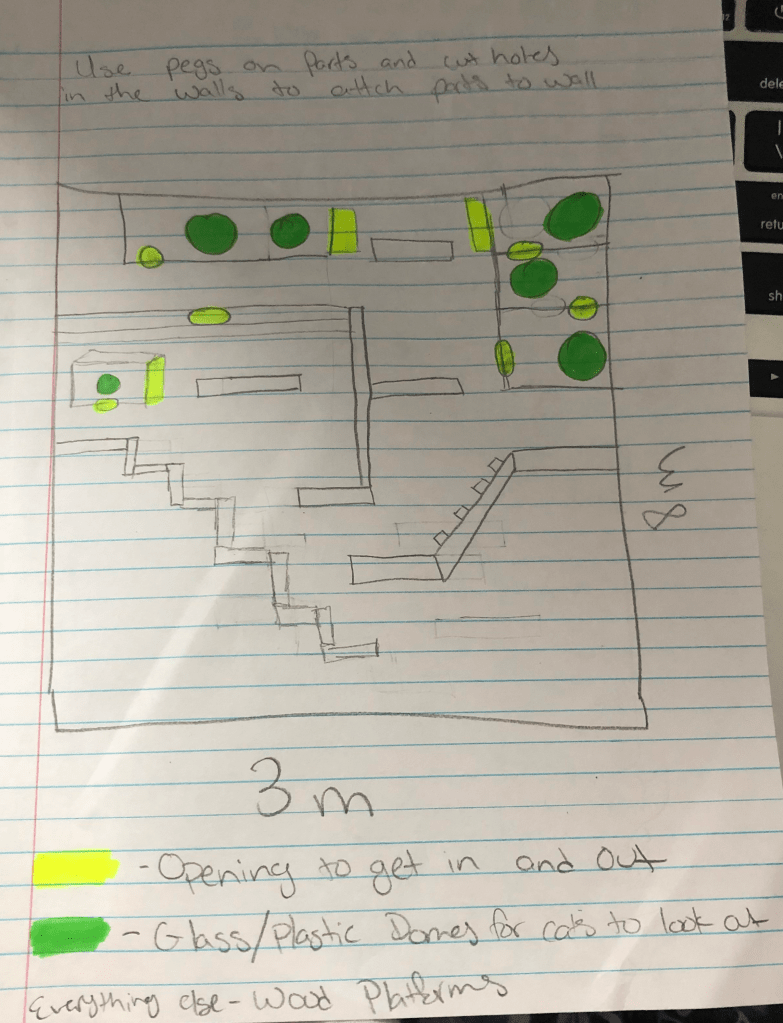
In the cat tree I am adding holes to allow cats to jump from platform to platform. Additionally, I am adding glass or plastic domes that the cats can look out of when they are up high. This can be seen in my first reference photo down below. I have posted my design below as well.
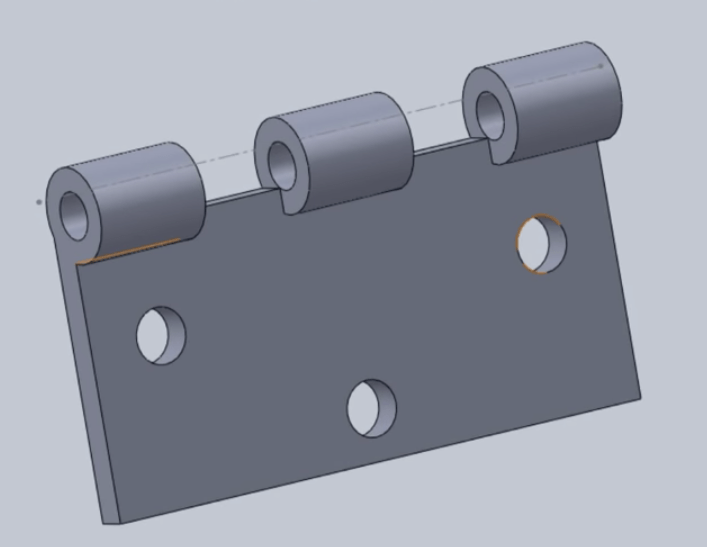
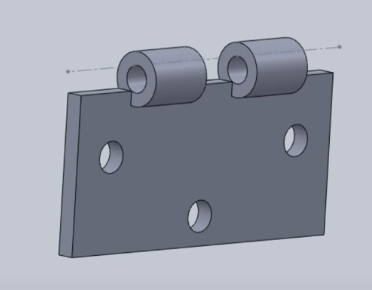
I went back and finished the hinges for the door that got deleted in the last post I made. They look exactly like the hinges in the previous post.
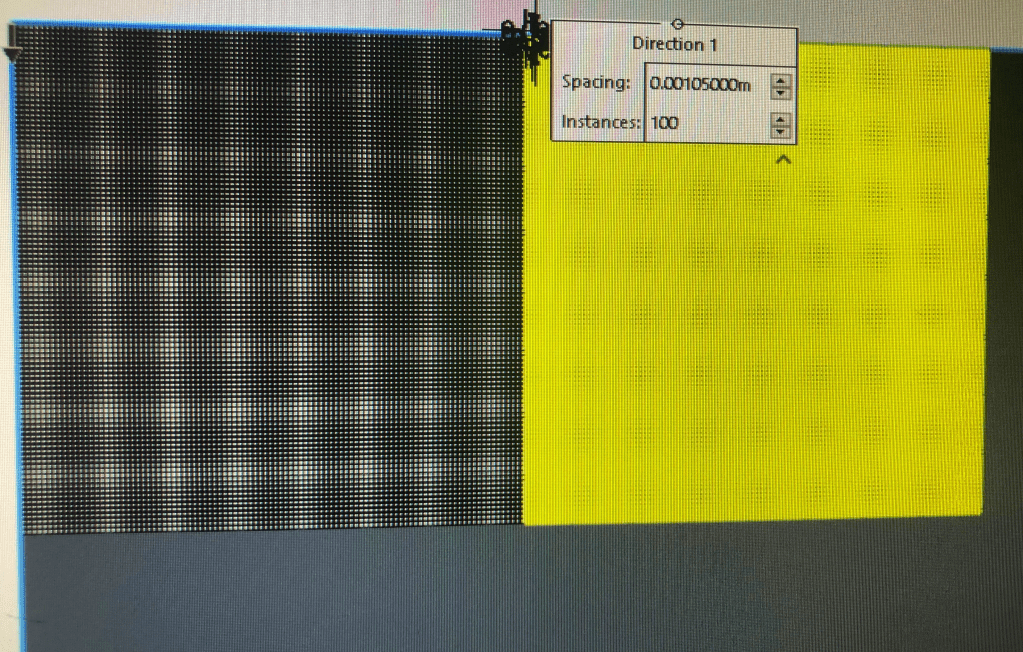
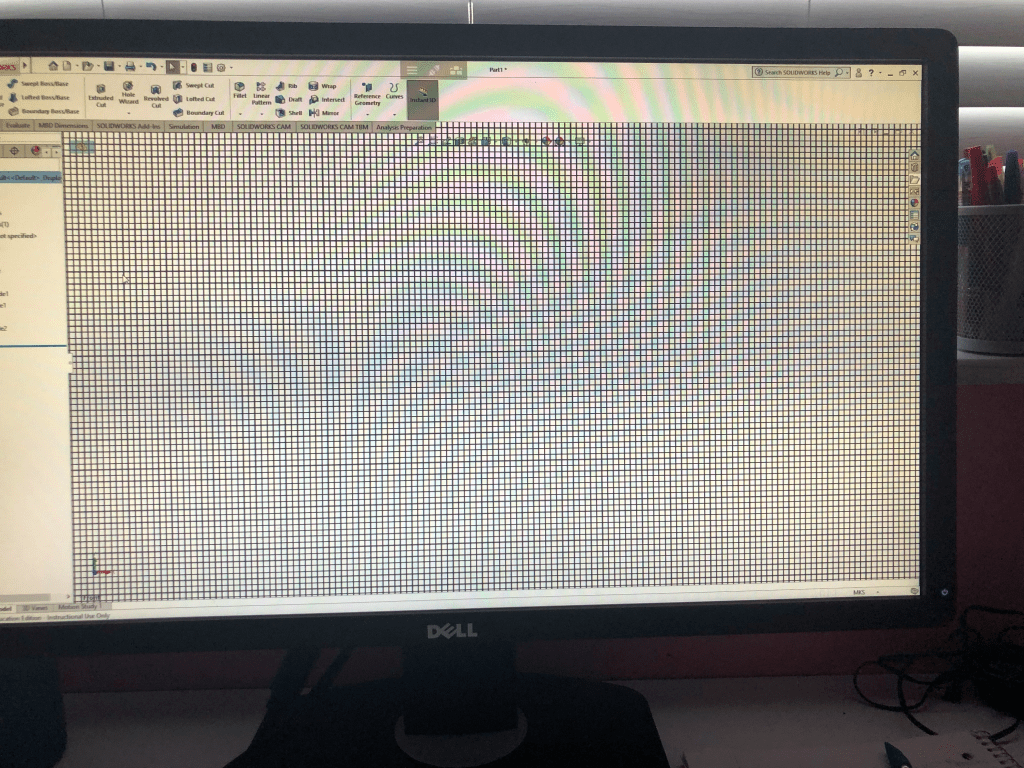
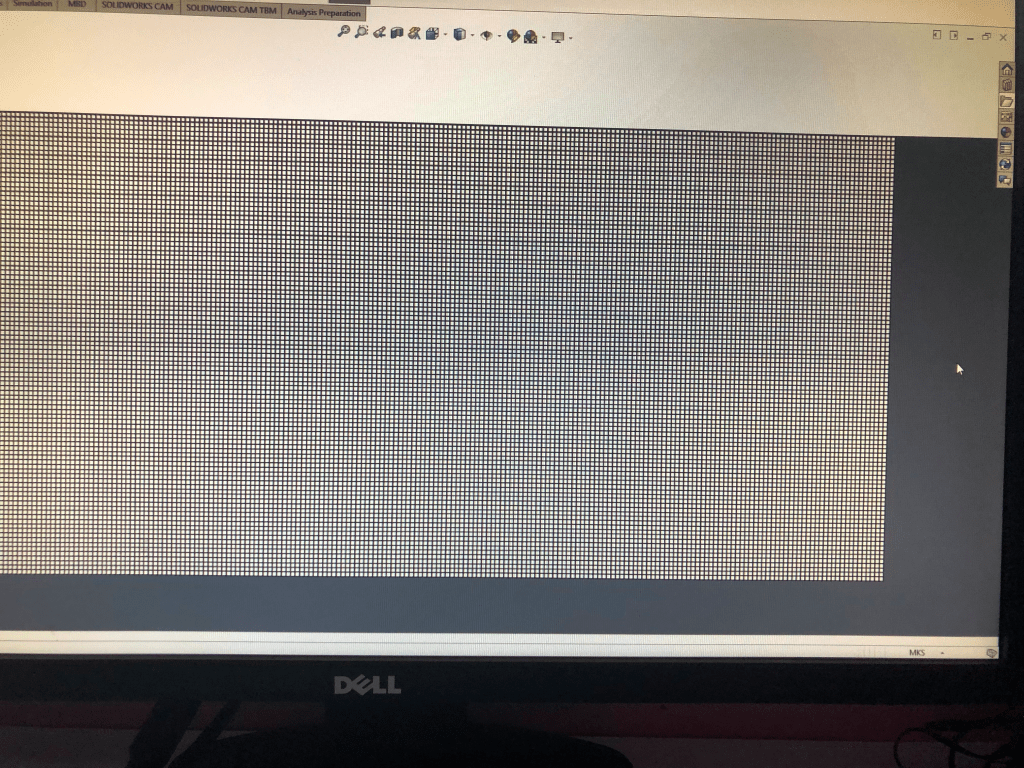
I also made the mesh screen that is going in the cat porch. This too me some time to do because I essentially had to make a whole bunch of tiny square cuts in a piece of metal. Luckily, solidworks has this amazing patter feature where you can mimic a sketch or feature in a circular or linear pattern. However, most people only use this to make a few reoccurring feature and not to make thousands of them.
When I first tried to make all the cuts in one go solidworks kept crashing because there were too many for it to handle. I then cut it down to only do 100 in the x and y direction at once. The first time it worked but the second time it did not. Finally I began doing it 50 at a time in each direction and that worked much better. I was only able to get a couple quick pictures on my phone of this being made due to the fact that it kept crashing so I will insert in down below.
Next week I would like to start working on the cat tree that will be positioned on the wall. I feel it will mostly be extruded rectangles that I will have to assemble on the wall once finished. My main task next week is to design and get all the dimensions I need down pat and model what I can with the time I have left.
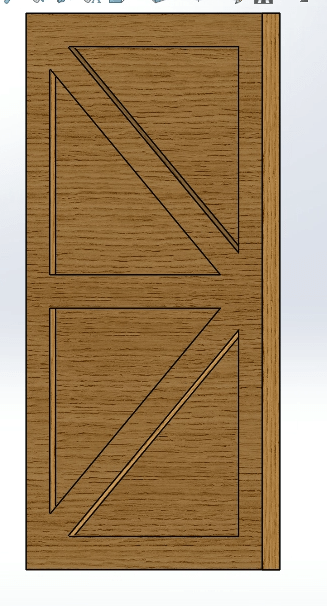
To create the door I made a simple rectangle and extruded it based off of the dimensions used to cut the door from the wall. I then sketched framing around the edges to create a look like it is panels of wood on the door. I continued to do this for a piece in the middle and two diagonal pieces.
To create the hinges I once again started with a rectangle. On a the right plane I then added circles that would act as my space for my pin to go through. I made three on one side of one hinge and two on the other so they can work with each other. I ended up losing the file for my hinges but I followed a video so I will attach pictures from the video and remake the hinges.
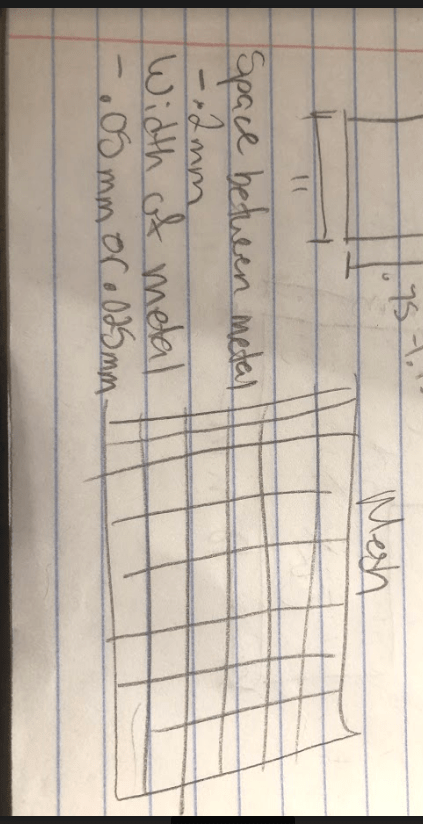
I then began to design the mesh panel that is going to be used. I decided to make the space between the lines of metal .2mm and the thickness of the actual metal .05mm or .025mm.
Due to my school shutting down I was not able to finish as much work as I was hoping to. Professors are trying to adjust to remote teaching which has resulted in them giving us significantly more work. The school has also taken away access to the IST from all of the students. For this reason I had to use solidworks through a chrome simulation so I was not able to assemble everything since it only saves the file to your student drive and not to you actual computer.
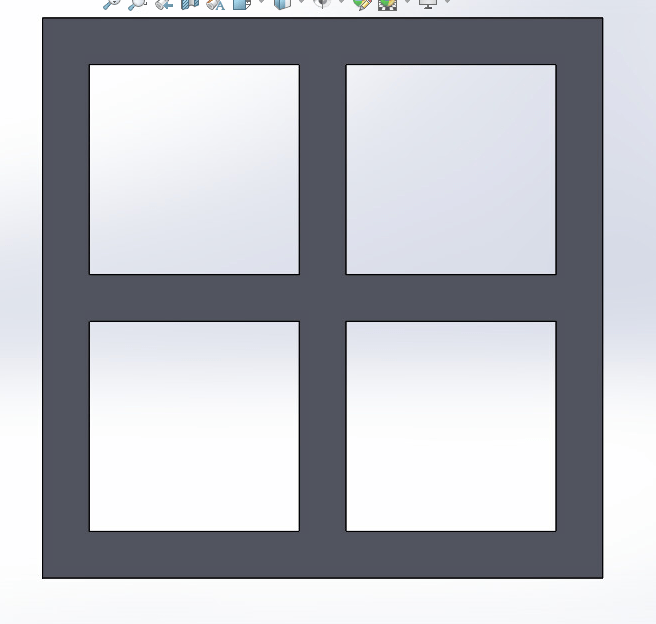
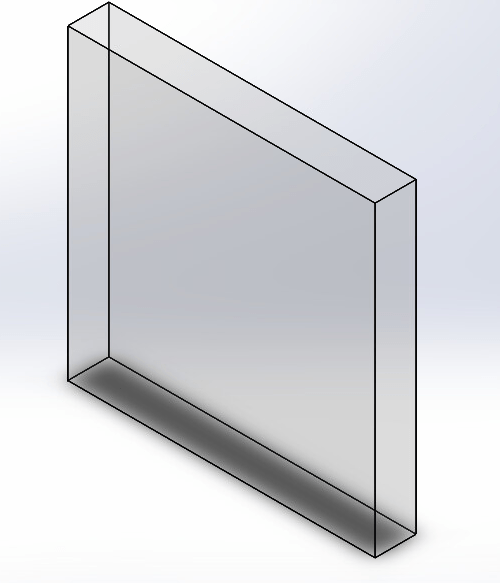
I built the frame for a window and the glass that will fit perfectly inside it. I decided to go with the smallest dimensions I planned which meant the window panes were .25m thick. The glass in the window ended up being 1.125m x 1.125m. The thickness of the window frame and glass were .15m, the same as the walls in the house.
I am still researching how to get a mesh screen in solidworks. If I am not able to find one I believe I can just make a metal wall and make a bunch of tiny squares using a linear pattern.
Screen shots of the window:
*when assembling the glass I will just assemble four of these into the four slots.
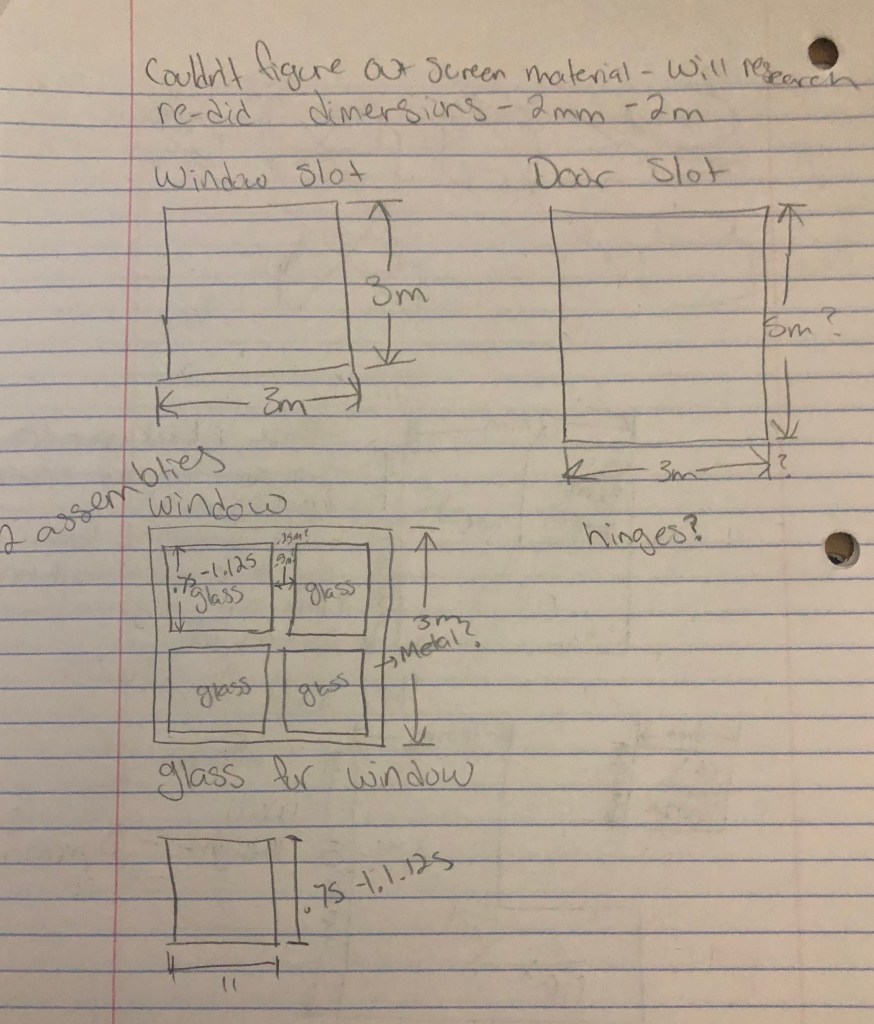
For the cat pen I need to make some windows and doors along with a screen for the porch. I unfortunately was not able to fully design this for a multitude of reasons but I was able to design it on paper and know the exact steps I will be taking. For the windows I will be creating the frame of the windows without the glass. I will then create glass that is the exact size to fit into the frame and put them together in an assembly file along with the cat pen. I have the sizes of the windows planned out and I have already cut out the spaces for them to go.
For the door I am going to add one leading to the porch and another leading to the inside of the house. I am not sure yet where these will go so I will have to cut and place them another day. As for the door I am not sure what kind of design to use or how to assemble it. I do not know if the intent is to have the user open the door and make it a moving part with hinges. If that’s not the case then I feel it is best to leave the door off.
For the screen I need to do more research on how to get a screen since it is not a preset material in the program. Once I figure that out I will be able to figure out how to place it on the porch.
I only have pictures of my design process at this time. I changed the dimensions of my last structure from Millimeters to Meters and cut out the planned spaces for the windows and doors. I save my files to google drive every time I update it but I spent about 45 minutes trying to not only get solidwork to open on the school desktops, since my computer is unable to use solidworks, but I tried to download my already made file and it would not allow me to. I am confident that since I have the design and process figured out it should not take me long and I am more than able to continue improving my structure for next weeks assignment.
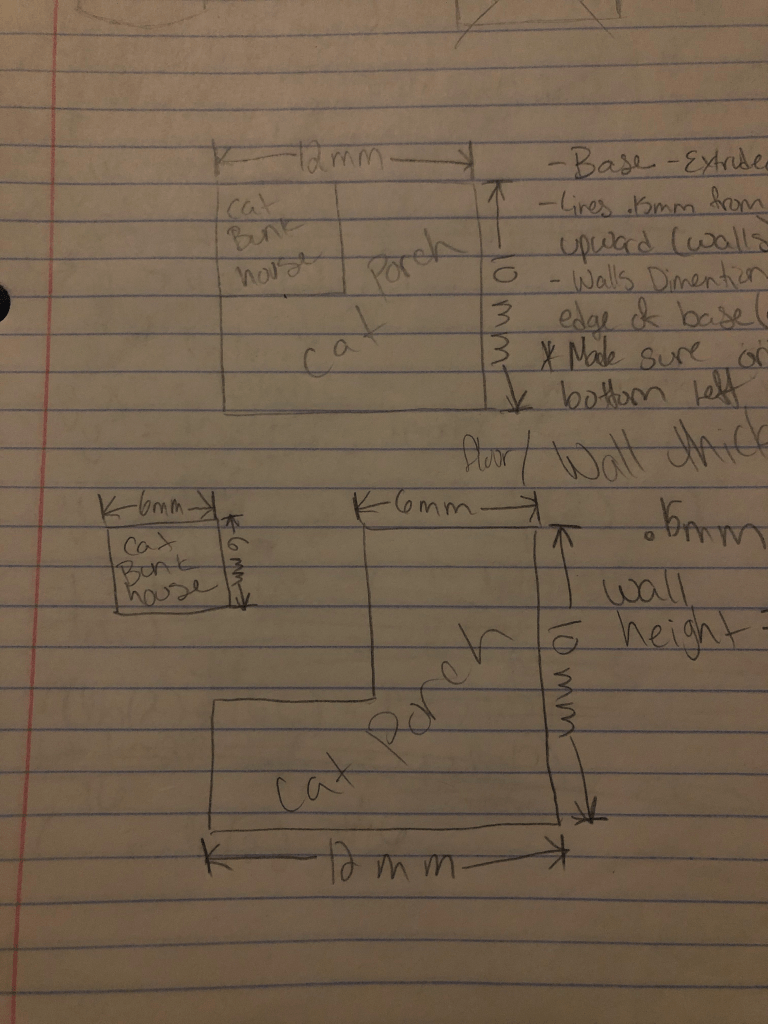
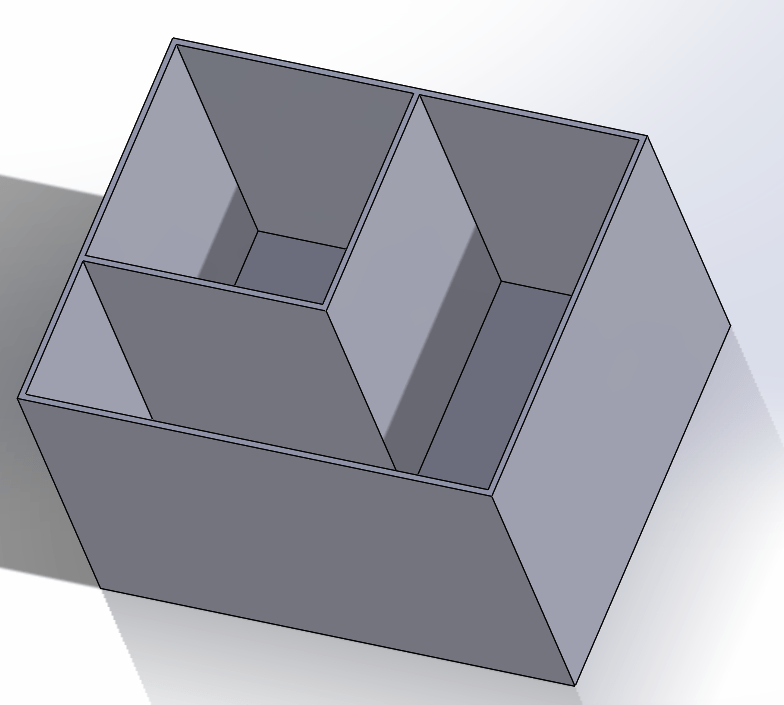
For this model I decided to begin by making 3 sketches. One of the bunk, one of the porch, and one of the two together. I went off of a drawing Beth had made but I just added the dimensions physically on the paper.
When creating I decided to only draw on the top plane and make upward extrusions from there since that seemed easiest. I began with a base that acted as the floor that would be the full dimensions for the bunk and porch.
I then drew the walls. I made a second box by dimensioning them .15mm from the original line of the floor. I then closed it by tracing over the original box and extruded it 8mm upwards to give the wall some height.
Finally, I made sure the origin was in the bottom left corner so the orientation was correct. In the top left corner I drew two perpendicular line measuring from the base. Then I added two more lines parallel to those and dimensioned them .15mm from the previous lines added to add thickness. To finish I closed the lines and extruded 8mm upwards once again.
Julianna and I got together and talked some more about how we were going to 3D model our buildings. Since there was no specification on the thickness of the walls, floor, or height of the walls we decided to pick numbers that we felt fit.
I watched the video on how to use Zapworks to track faces and have 3D models follow the face. To make a model follow an image is pretty simple. The actual program to track a face is already built into Zapworks. What is needed is to add a model and attack it to the face.
The hard part is the positioning of everything. You can use the origin to position the model exactly where you want it on a person face. You also need to make sure that if you are using something like a helmet you are able to use the face to block the back of the helmet so it is not showing through the users face.
Julianna and I got together to talk about the different parts of the pet rescue that we would be designing. We talked about parameter and how to begin to the design. We also talked about what our new duties were since they had changed.
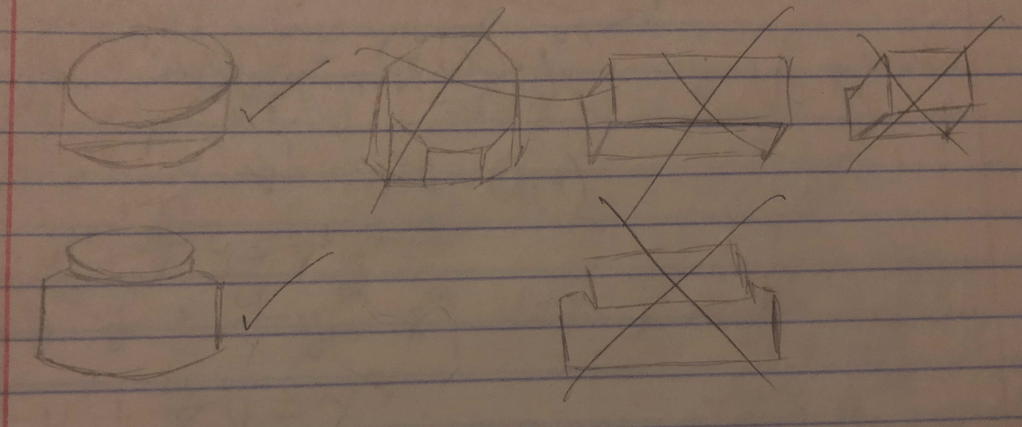
I was given the task of modeling a generic button that can be used for practically anything for the game. I played with a few different shapes for the button such as: Circles, hexagons, rectangles, and squares. In the end I felt like the circle was the best option for the button since it is the most versatile and most used type of button.
I then played around with the idea of just having a regular cylinder or having it push down into the platform. I felt just having the cylinder was too boring so I began designing the platform that the button would press into.